
Choosing the right Adapter Ring starts with knowing exactly what two parts must connect. The term can describe different products, so never rely on the name alone. Check the equipment model, connection type, and manufacturer’s specifications before comparing options. A ring that looks correct on a desk may not fit once threads, shoulders, or locking tabs meet.
Measure the relevant diameters carefully, and confirm whether dimensions are listed in millimeters or inches. Then check thread pitch, mount style, thickness, and any direction requirements. For camera accessories, for example, a filter thread may need to match the lens, while a step-up or step-down ring changes the diameter for another accessory. Other equipment may use entirely different interfaces. Small details matter.
Consider the material and the conditions of use. Aluminum is light; steel may suit applications that need greater wear resistance. Check for corrosion exposure, heat, vibration, and the weight the connection must support. Do not assume a tighter fit means a safer fit. Forcing mismatched threads can damage both parts.
A product chart is a useful starting point, not a guarantee. Compare the specifications with the item in hand, and ask the supplier when measurements or compatibility remain unclear. It can feel tedious. Yet one careful measurement is usually easier than returning the wrong ring or troubleshooting a loose connection. Recheck the fit without forcing it, especially when the connected equipment is valuable.
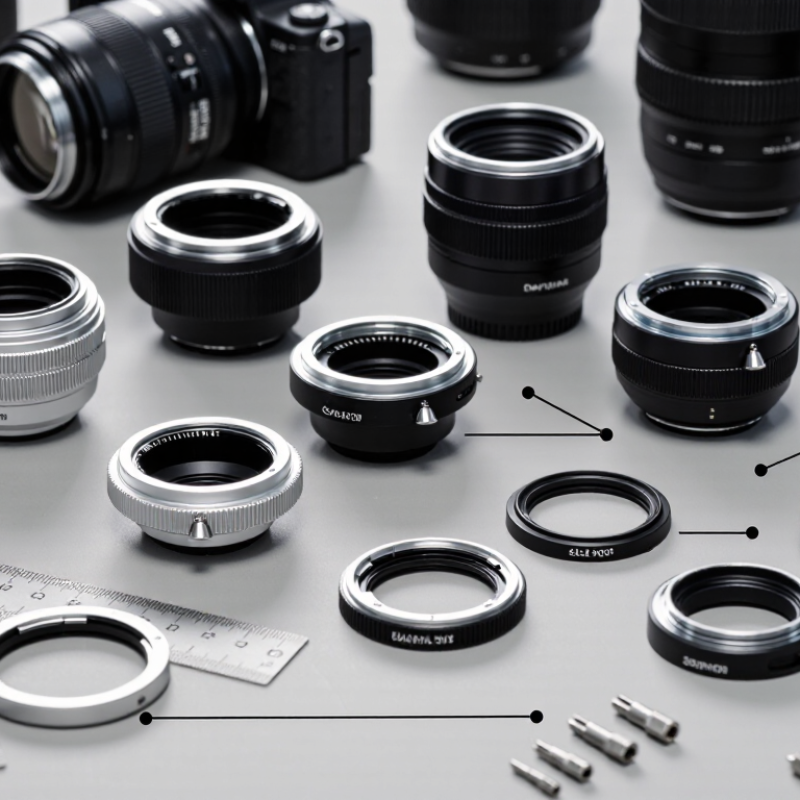
Before choosing an adapter ring, identify the exact equipment you need to connect. For camera setups, this may mean matching a lens to a filter, hood, or other front-mounted accessory. Check the markings on the lens and accessory; filter diameters are often shown in millimeters beside a diameter symbol. If markings are worn or unclear, measure carefully with a caliper. Small details matter.
Next, confirm how each part attaches. A shared diameter does not guarantee a fit: thread pitch, bayonet shape, and mounting direction can differ. Check the equipment manual or manufacturer’s specifications rather than relying on appearance alone. I still find it easy to overlook clearance around a lens barrel, especially with wide-angle lenses. A ring that fits the threads may cause vignetting or prevent a hood from attaching properly. Do not force it. Test the connection gently, keep threads clean, and stop if the ring catches or wobbles. If the equipment uses a proprietary mount or an unfamiliar connection, verify compatibility before buying; a little checking beats a loose, unusable setup.
Measure the parts that will actually meet, not just the adapter ring’s outer edge. Use a caliper to check the opening diameter and the mating surface. Record measurements in millimeters or inches, and do not mix units. Small differences matter. A ring can look close but still sit unevenly or leave a gap.
Check the thread type, diameter, and pitch. Diameter alone is not enough: two threads may appear similar but fail to engage correctly. A thread-pitch gauge helps identify the spacing between peaks. Note whether the thread is internal or external, and check its direction. If the part has no thread, record the hole spacing and mounting pattern instead. Measure center to center, not from one hole edge to another.
Also measure the mounting depth, shoulder width, and any clearance needed for nearby parts. A ring that fits the thread may still bottom out before its face seats. Compare your notes with the adapter’s specified dimensions, then test the fit by hand. Never force a resistant thread; back it out and inspect for mismatch or damage. I would recheck the measurements before ordering, especially when the old ring is worn or slightly distorted. That extra check can prevent a frustrating return.
Example dimensions for one interface: the required mounting diameter is 82.5 mm, the thread is M42 × 1.0, and the mounting bolt-circle diameter is 60 mm. The candidate matches the thread major diameter and bolt circle, but its 82.0 mm mounting diameter is 0.5 mm smaller. Confirm the thread pitch and form, fit, and applicable tolerances before selecting a ring; these example dimensions are not a universal standard.
The right adapter ring must handle both the applied load and the conditions around it. Steel often suits higher loads and repeated movement, but it may need corrosion protection in damp or salty environments. Stainless steel can resist corrosion better, though its grade and load rating still matter. Aluminum is lighter and may work well where weight is important, but check its strength against the actual forces involved. Small details matter. Heat, vibration, and frequent fitting can change how a ring performs over time.
Consider the parts the ring touches, too. A softer polymer ring can reduce scratching and noise in a light-duty assembly, but heat or pressure may deform it. Check the manufacturer’s load limits, temperature range, and compatibility notes rather than choosing by appearance alone. A shiny surface is not proof of suitability. I would also inspect the ring after installation; uneven wear or looseness can signal a mismatch, although it may take time to spot.
How to Choose the Right Adapter Ring?
Check Compatibility with the Equipment and Operating Conditions
An adapter ring must match both the equipment and the conditions it will face. Check the connection type, diameter, thread pitch, and seating depth against the equipment’s specifications. A ring that appears to fit may still wobble or leave a small gap. That gap matters. It can cause leakage, uneven loading, or poor alignment, depending on the application.
Consider what the ring will encounter during operation. Temperature changes can affect clearances, while vibration may loosen a connection that feels secure on a workbench. Check the ring material against nearby fluids, cleaning agents, and expected wear. Also confirm the permitted pressure and load limits in the equipment documentation. If those limits are unclear, ask a qualified technician rather than estimating. It’s easy to overlook.
Before installation, inspect the mating surfaces for burrs, dirt, or damage. Fit the ring by hand first; don’t force threads that resist turning. A visual check is useful, but it cannot confirm every dimension. Measure critical interfaces with suitable tools, then test the assembly under controlled operating conditions. I’ve found that a tiny mismatch can be hard to spot until the equipment runs, so leave room to recheck the fit.
| Equipment or Interface | Measurements to Confirm | Operating Conditions | Suitable Ring Characteristics | Compatibility Checks |
|---|---|---|---|---|
| Rotating shaft or bearing assembly | Shaft diameter, mating bore, required fit, and available axial space | Rotational speed, radial and axial load, vibration, and temperature | Machined ring with material and fit specified for the shaft and bearing arrangement | Check shaft and bore tolerances, mounting method, surface condition, and the equipment manufacturer’s fit requirements. |
| Pipe, hose, or fluid connection | Inside and outside diameters, thread type, pitch, and sealing-face dimensions | Working pressure, fluid type, temperature, and exposure to corrosion | Ring material and sealing arrangement rated for the fluid and operating pressure | Confirm thread standards and sealing method. Matching nominal diameter alone does not guarantee a leak-tight connection. |
| Optical or inspection equipment | Mounting-thread diameter and pitch, interface depth, and clear aperture | Required field of view, light transmission, focus range, and vibration | Precisely threaded ring with adequate clear aperture and appropriate optical finish, if required | Verify thread compatibility and check that the ring does not obstruct the optical path or prevent the required focus. |
| Electrical enclosure or panel opening | Panel-hole diameter, component thread, panel thickness, and available clearance | Ingress protection needs, ambient temperature, vibration, and electrical environment | Ring with compatible threads, suitable material, and any required sealing or locking features | Check enclosure requirements, grounding or insulation needs, and whether a gasket is required to maintain the specified seal. |
| High-temperature equipment | Mating diameters, expansion allowance, and installation clearance | Continuous and peak temperatures, thermal cycling, and nearby materials | Material and fit suitable for the temperature range and expected thermal expansion | Check the material’s temperature limits and account for expansion; a room-temperature fit may change during operation. |
| Corrosive, wet, or outdoor equipment | Interface dimensions, fastener details, and sealing-surface geometry | Moisture, chemicals, salt exposure, cleaning agents, and maintenance frequency | Corrosion-resistant material or protective finish compatible with the environment | Confirm chemical compatibility for all exposed materials, including coatings and seals, and avoid incompatible metal pairings where galvanic corrosion is a concern. |
Selection note: Measure the actual mating parts and verify dimensions, tolerances, material limits, and load ratings against the equipment documentation. Adapter-ring dimensions and ratings are application-specific; do not assume that rings with the same nominal size are interchangeable.
Choosing an adapter ring is only half the job; the fit must be checked before use. Compare the ring’s diameter, thread type, and pitch with both parts. Similar-looking threads are not always compatible. Clean the contact surfaces with a dry, lint-free cloth, then inspect for burrs, dents, or trapped dust. Small debris can create a gap.
Start the ring by hand. It should turn smoothly without catching or rocking. Stop if you feel sharp resistance; forcing it may damage the threads or leave the connection crooked. Snug is enough. A tool can overtighten a small ring, so use one only when the instructions call for it. Look around the joint under good light. The edges should sit evenly, with no visible gap. I have learned that a slight wobble is easy to dismiss, but it often signals a poor match.
Test the assembled connection gently before relying on it. Apply light pressure, then check whether either part shifts or loosens. If the ring carries an accessory, add its normal load gradually and watch for movement. For a fluid or air connection, follow the component maker’s specified leak-check procedure rather than guessing. A secure fit should also work as intended: airflow, movement, or access should not be blocked. If the connection feels unstable, remove the ring and recheck compatibility. A second look is worth the minute.
| Cookie | Duration | Description |
|---|---|---|
| cookielawinfo-checkbox-analytics | 11 months | This cookie is set by GDPR Cookie Consent plugin. The cookie is used to store the user consent for the cookies in the category "Analytics". |
| cookielawinfo-checkbox-functional | 11 months | The cookie is set by GDPR cookie consent to record the user consent for the cookies in the category "Functional". |
| cookielawinfo-checkbox-necessary | 11 months | This cookie is set by GDPR Cookie Consent plugin. The cookies is used to store the user consent for the cookies in the category "Necessary". |
| cookielawinfo-checkbox-others | 11 months | This cookie is set by GDPR Cookie Consent plugin. The cookie is used to store the user consent for the cookies in the category "Other. |
| cookielawinfo-checkbox-performance | 11 months | This cookie is set by GDPR Cookie Consent plugin. The cookie is used to store the user consent for the cookies in the category "Performance". |
| viewed_cookie_policy | 11 months | The cookie is set by the GDPR Cookie Consent plugin and is used to store whether or not user has consented to the use of cookies. It does not store any personal data. |