
Choosing the right Polyethylene Pipe Cutter is not a minor purchasing decision. A poor tool can leave crushed edges, uneven cuts, or melted plastic around the pipe wall. Those defects may seem small. They can complicate fittings, reduce joint quality, and slow an entire installation.
David A. Willoughby, author of Plastic Piping Handbook, offers a useful guiding principle: “The tool must support the pipe, not distort it.” That idea should shape every buying decision. A dependable Polyethylene Pipe Cutter needs a sharp, replaceable blade and a stable frame. It should match the pipe’s outside diameter and wall thickness. Handle comfort matters when several cuts are required. So does cutting speed. A tool that feels impressive in a showroom may become tiring beside a trench.
This guide examines seven practical selection points, including blade design, cutting capacity, alignment, safety, maintenance, portability, and total operating cost. Real working conditions deserve attention. Mud on the pipe, cold weather, limited space, and awkward angles can expose weaknesses quickly. Some tools also claim universal performance. That claim deserves skepticism. “Universal” can mean acceptable, not excellent. The best Polyethylene Pipe Cutter should produce a clean, square cut without excessive force. It should also remain predictable after repeated use. That is where many evaluations become incomplete. Price matters, but replacement blades, downtime, and damaged pipe matter too. A careful choice may look slower at first. It often saves time later.
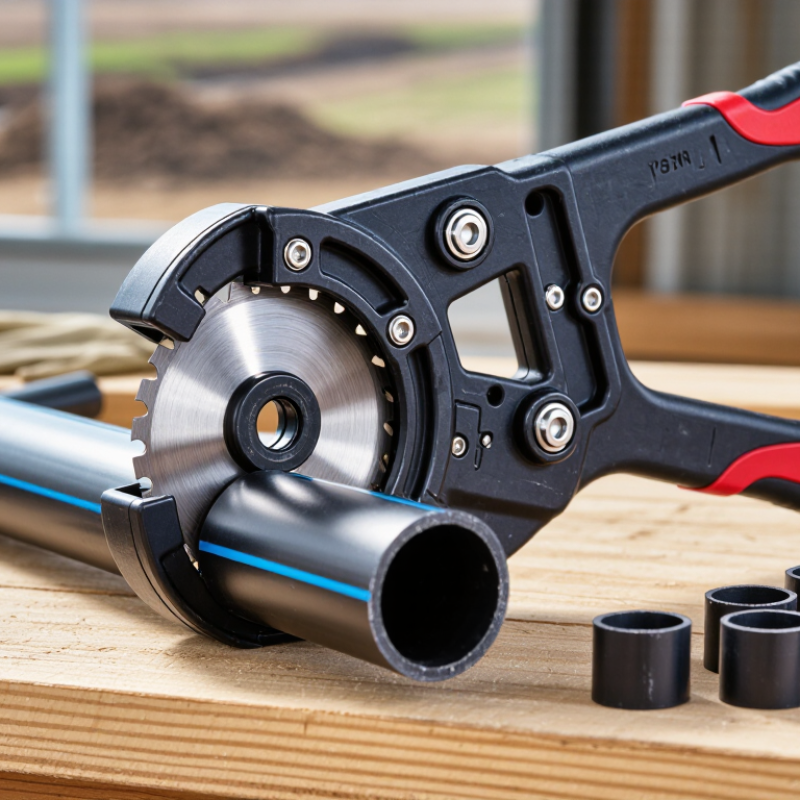
Choosing the best polyethylene pipe cutter starts with the pipe itself. Polyethylene may be flexible, semi-rigid, or heavily reinforced. Check whether it is HDPE, MDPE, or another PE grade. A cutter designed for thin tubing may crush a thick utility pipe. The blade should create a square cut without tearing the outer surface. I have found that a clean edge matters more than cutting speed.
Tip: Measure the outside diameter with calipers, not by visual estimation. Diameter affects the cutter’s opening and cutting force. Also check the wall thickness. Two pipes can share the same diameter but need different tools. A thin wall may deform under excessive pressure. A thick wall may require a ratcheting mechanism or a stronger replaceable blade. Small details matter.
Tip: Test the cutter on a short offcut when possible. Watch for flattening, spiraling, or rough edges. The handle should remain stable, even with wet gloves. Avoid choosing only by the largest listed diameter. That specification may assume ideal material and perfect technique. I once selected a cutter with enough capacity but poor control; the cut was usable, yet not truly square. For field work, inspect blade sharpness, grip comfort, adjustment range, and spare-blade availability. A practical cutter should match the material, diameter, and wall thickness you actually handle.
7 Tips for Choosing the Best Polyethylene Pipe Cutter
Choosing a polyethylene pipe cutter starts with matching its type to the pipe’s diameter and wall thickness. In field work, I have found that a compact ratchet cutter suits smaller pipes, often up to about 42 mm. It is quick, portable, and leaves a fairly smooth edge. However, thick-wall pipe can resist the blade and create a slightly angled cut. Small pipes cut cleanly.
Tip 1: Check the stated cutting capacity, not only the handle size. A rotary cutter or chain-style cutter usually handles medium and large polyethylene pipes more effectively. Rotary tools guide a cutting wheel around the pipe, while chain cutters distribute pressure across several points. Their capacity may reach 160 mm or more, depending on the model and pipe hardness. Always compare the maximum diameter with the actual outside diameter.
Tip 2: Consider wall thickness and SDR rating. Two pipes can share the same diameter but require different cutting force. For larger installations, powered saws can improve speed, but they need firm support and controlled feeding. Tip 3: Inspect the finished edge. A rough edge may complicate socket fitting or fusion preparation. Follow technical instructions from reliable manufacturers and verify the tool before use. I sometimes prefer a slower manual cut because it exposes less heat and fewer mistakes. Yet, that choice is not always practical on a busy site.
Compare common cutter types by the approximate maximum pipe outside diameter they can handle. Actual capacity varies by tool design, pipe material, and wall thickness; check the manufacturer’s specifications before choosing.
Use hand cutters for smaller pipes and a suitable rotary cutter or powered saw for larger diameters. For clean, square cuts, choose a tool rated for the pipe’s outside diameter.
7 Tips for Choosing the Best Polyethylene Pipe Cutter
Assess Blade Quality, Handle Design, and Ease of Use
Start with blade quality. Choose hardened, corrosion-resistant steel with fine, even teeth. The edge should meet the pipe squarely without crushing its oval wall. The Plastics Pipe Institute’s Handbook of Polyethylene Pipe emphasizes clean, controlled preparation before joining. That guidance matters here. Inspect the hinge, pivot pin, and blade lock for play. A loose pivot creates angled cuts and extra finishing work. Test the cutter on scrap pipe first.
Handle design decides how confidently you can work in a trench or cramped cabinet. Select textured grips with enough length for both hands, but avoid bulky handles. A spring return can reduce repeated opening motions. The 2023 BLS Survey recorded about 2.6 million nonfatal workplace injuries and illnesses. Ergonomic choices deserve attention. Check whether the handles stay comfortable while wearing gloves. Small details often control fatigue.
Assess seven points: grip, reach, alignment, cutting force, release, cleaning, and storage. The blade should open smoothly and close without sudden snapping. Look for a visible alignment mark. It prevents guesswork. I once trusted a sharp cutter with a weak latch; it slipped during transport. That mistake changed my checklist. I now carry a cover and inspect the edge after every dozen cuts. A cutter that feels light may still fatigue your wrist. Try it with gloves. This is often overlooked.
Choosing the Best Polyethylene Pipe Cutter
A polyethylene pipe cutter should feel secure before it feels fast. Look for a guarded blade that limits accidental contact. A locking lever prevents movement during storage and transport. Choose handles with textured grips, especially for wet gloves. Test the hinge for smooth movement. Excessive resistance may signal poor alignment or weak construction. A stable cutting base also helps prevent crushed pipe edges. I once underestimated grip comfort during a long installation. My hand fatigue affected cutting accuracy.
Portability matters on outdoor projects and inside narrow service spaces. Select a compact cutter that fits easily into a tool bag. A lightweight frame reduces strain, but extreme lightness can suggest fragile parts. Check whether the handle opens wide enough for the pipe diameter you use. A simple carrying sleeve can protect the blade and nearby tools. Inspect the locking mechanism before each trip. Small details become important when equipment moves between muddy sites.
Maintenance needs should be practical, not theoretical. Clean plastic shavings from the blade after every cutting session. Wipe the pivot and inspect it for looseness. Replace dull blades instead of forcing them through the pipe. Follow the tool maker’s lubrication guidance, because excess oil can attract grit. Keep spare blades sealed and dry. Some cutters promise effortless maintenance, but every moving tool needs attention. Record unusual cuts or pipe deformation. That habit can reveal alignment problems before they become costly.
| Tip | What to Check | Practical Guidance | Why It Matters |
|---|---|---|---|
| 1. Match the cutter to the pipe | Supported outside diameter, pipe material, and wall thickness. | Confirm the cutter’s stated capacity against the pipe specifications. For large-diameter or thick-wall polyethylene pipe, a dedicated pipe-cutting tool or suitable powered method may be needed instead of a small hand cutter. | A tool used beyond its rated capacity can produce an uneven cut or become difficult to operate. |
| 2. Check the safety features | Blade lock or latch, secure handles, and any supplied blade guard. | Choose a design that keeps the blade closed during storage and transport. Follow the tool instructions, secure the pipe before cutting, and keep hands clear of the blade path; wear appropriate eye protection. | Sharp blades and moving mechanisms can cause cuts or injury, especially when the pipe shifts during cutting. |
| 3. Consider the cutter type | Scissor-style, ratcheting, or other pipe-cutting mechanism. | For compatible smaller pipe, a hand cutter may be convenient. A ratcheting mechanism can reduce the force needed per handle stroke, while larger or heavier pipe may require a purpose-built cutting system. | The right mechanism makes the job more manageable and helps avoid forcing a tool through pipe it is not designed to cut. |
| 4. Look for a clean, square cut | Blade alignment, pipe support, and the tool’s ability to cut without crushing or excessive deformation. | Use a sharp blade and hold the cutter square to the pipe. Inspect the cut end and remove burrs or prepare the pipe as required by the joining method and its installation instructions. | A straight, properly prepared end supports reliable fit-up and can help prevent problems during joining. |
| 5. Evaluate portability and comfort | Tool weight, handle grip, overall size, and ease of carrying to the work area. | For field work, choose a tool that can be carried and stored safely. Check that the handles feel secure and provide enough leverage for the pipe sizes you routinely cut. | A portable, comfortable tool is easier to use across a job site and may reduce hand fatigue during repeated cuts. |
| 6. Check blade replacement and availability | Whether the blade is replaceable and how it is changed. | Review the tool instructions for blade-change steps and confirm that compatible replacement blades can be obtained. Replace a dull, damaged, or chipped blade rather than continuing to force it through the pipe. | A sharp, correctly fitted blade helps maintain cut quality and reduces the effort needed to operate the cutter. |
| 7. Plan for routine maintenance | Cleaning, inspection, lubrication requirements, and storage guidance. | After use, remove dirt and pipe residue, inspect the blade and moving parts, and lubricate only as directed by the manufacturer. Store the cutter dry with its blade locked or covered. | Basic care helps prevent corrosion, binding, and premature wear, while safe storage protects both the blade and the user. |
Price is only one part of the decision. A low-cost cutter may work well for occasional repairs, but repeated cuts can expose weak handles or dull blades. I have found that polyethylene pipe thickness matters more than many buyers expect. Check the cutter’s rated diameter and wall thickness before ordering. A tool designed for small tubing may struggle with larger pipe and leave an uneven edge.
Choose a sharp, replaceable blade for cleaner cuts and longer service. Inspect the locking mechanism, handle grip, and frame for solid construction. These details matter when working outdoors, wearing gloves, or cutting several pipes in one day. Weight also affects productivity. A heavy tool can feel stable, yet it may cause hand fatigue during installation. Test the opening action if possible. It should move smoothly, not snap suddenly.
Consider the project environment, cutting frequency, and available maintenance time. A basic cutter may suit a home repair, while site crews need stronger parts and easy blade replacement. Look for corrosion-resistant components when tools face moisture or soil. Safety still requires steady support and controlled pressure. Never force a dull blade. I once selected a cheaper model for a short job, then spent extra time correcting rough cuts. That choice saved money at checkout, but not in labor. Performance records, clear specifications, and a realistic replacement cost provide more reliable guidance than appearance alone.
| Cookie | Duration | Description |
|---|---|---|
| cookielawinfo-checkbox-analytics | 11 months | This cookie is set by GDPR Cookie Consent plugin. The cookie is used to store the user consent for the cookies in the category "Analytics". |
| cookielawinfo-checkbox-functional | 11 months | The cookie is set by GDPR cookie consent to record the user consent for the cookies in the category "Functional". |
| cookielawinfo-checkbox-necessary | 11 months | This cookie is set by GDPR Cookie Consent plugin. The cookies is used to store the user consent for the cookies in the category "Necessary". |
| cookielawinfo-checkbox-others | 11 months | This cookie is set by GDPR Cookie Consent plugin. The cookie is used to store the user consent for the cookies in the category "Other. |
| cookielawinfo-checkbox-performance | 11 months | This cookie is set by GDPR Cookie Consent plugin. The cookie is used to store the user consent for the cookies in the category "Performance". |
| viewed_cookie_policy | 11 months | The cookie is set by the GDPR Cookie Consent plugin and is used to store whether or not user has consented to the use of cookies. It does not store any personal data. |