Superabrasive

How to Choose the Best Polishing Tools in 2026?

Choosing the best polishing tools in 2026 requires more than comparing prices, motor power, or attractive product photos. The right choice depends on the material, surface condition, desired finish, working space, and operator experience. A tool that performs beautifully on stainless steel may leave cloudy marks on painted panels or delicate stone. Small details matter: pad hardness, abrasive grade, speed control, heat buildup, vibration, and dust collection can change the final result.

Dr. David Whitehouse, a respected surface-metrology expert, wrote, “The surface is the fingerprint of the manufacturing process.” This principle remains valuable when selecting polishing tools. A professional should examine the surface before choosing a machine or compound. Deep scratches need controlled cutting. Light haze may require a softer pad and finer abrasive. Excessive speed can create heat rings, while insufficient pressure can waste time. There is no universal winner.

A reliable buying process should include practical testing. Compare two or three polishing tools on the same material, using equal pressure and similar working times. Record the finish, temperature, noise, fatigue, and compound consumption. Ask whether replacement pads are easy to obtain. Check the manufacturer’s specifications and safety guidance, rather than trusting vague marketing claims. Experience helps, but it can also create habits that deserve reconsideration. I have seen skilled operators choose familiar equipment, even when a slower tool produced a cleaner and more consistent finish. The best polishing tools are not always the fastest. They are the tools that provide predictable control, repeatable results, and a finish appropriate for the actual application.
How to Choose the Best Polishing Tools in 2026?

Polishing Tool Basics: Types, Materials, and Core Functions

How to Choose the Best Polishing Tools in 2026?

Polishing tools differ by shape, abrasive material, and finishing purpose. Abrasive discs remove surface marks quickly from broad, flat areas. Flap wheels blend edges while leaving a more even texture. Felt or cotton wheels work with polishing compounds for brighter finishes. Wire brushes clean rust, scale, and loose coatings, but they can leave visible scratches. Small abrasive points reach corners and narrow grooves.

Material selection should match the workpiece. Aluminum oxide suits many steel applications and general smoothing. Silicon carbide cuts harder surfaces and produces a cleaner finish on some nonferrous metals. Diamond abrasives handle extremely hard materials, but their cost requires careful planning. Ceramic abrasives can remove stock efficiently, though excessive pressure may create heat. Less pressure often works better.

The core function matters more than appearance. Choose a tool for cutting, deburring, blending, satin finishing, or mirror polishing. Check the tool’s rated speed before mounting it. Secure the workpiece and test a hidden area first. In practical shop trials, heat discoloration usually signals too much pressure or poor tool selection. I have seen polished edges look attractive but measure inaccurately afterward. That mistake is easy to miss. A finish can be bright yet uneven under direct light. Recheck the surface from several angles, especially around corners and welds.

How to Choose the Best Polishing Tools in 2026?

Polishing Tool Basics: Types, Materials, and Core Functions

The chart compares representative abrasive particle sizes used by common polishing tools. A larger particle size generally supports faster material removal, while a smaller size is used for finer finishing. Actual results depend on the workpiece material, pressure, speed, coolant, and compound formulation.

Coated Abrasive Disc

Aluminum oxide on a backing material; commonly used for stock removal, blending, and surface preparation.

Silicon Carbide Sheet

Sharp, friable silicon carbide grains; suitable for finishing metals, glass, ceramics, and painted surfaces.

Diamond Polishing Pad

Synthetic diamond abrasive; selected for hard materials such as stone, glass, ceramics, and hardened alloys.

Felt Wheel with Compound

A soft felt carrier with fine abrasive compound; primarily used for luster enhancement and final polishing.

Reference basis: representative FEPA P-grade particle sizes for coated abrasives and typical nominal particle sizes used in diamond and polishing compounds. The values are indicative rather than universal product specifications.

Assessing Surface Requirements and Desired Finishes

How to Choose the Best Polishing Tools in 2026?

Assessing Surface Requirements and Desired Finishes

Choosing a polishing tool in 2026 starts with the surface, not the machine. A scratched steel panel, resin component, and stone countertop need different contact methods. Inspect the material, damage depth, edge shape, and heat tolerance before choosing equipment. I have learned that gloss can hide uneven polishing. Good results require controlled pressure, suitable abrasive grades, and steady movement. Do not judge quality by shine alone.

Define the desired finish before work begins. A mirror finish needs finer abrasives and careful cleaning between stages. A satin finish may need uniform directional passes instead of maximum reflectivity. Flat areas often benefit from broad, stable tools, while curved edges require smaller, more flexible attachments. Always test a hidden section first. Small trials reveal heat marks, clouding, or unwanted texture. My own process is not perfect; I sometimes over-polish one edge and must correct the transition.

Tips: Use light pressure and let the abrasive do the work. Check the surface under direct and angled light. Replace worn abrasives promptly. Keep separate polishing pads for different materials. Record the abrasive grade, speed, and finish achieved, even when the result seems acceptable.

Comparing Abrasives, Machines, and Manual Polishing Tools

How to Choose the Best Polishing Tools in 2026?

Comparing Abrasives, Machines, and Manual Polishing Tools

Choosing a polishing tool starts with the surface, not the catalog. Abrasive sheets suit controlled work on small metal edges and painted panels. Diamond compounds work well on hard stone, glass, and selected metals. Grit progression matters more than a single aggressive product. Start gently. A rough abrasive can leave scratches that later stages cannot remove.

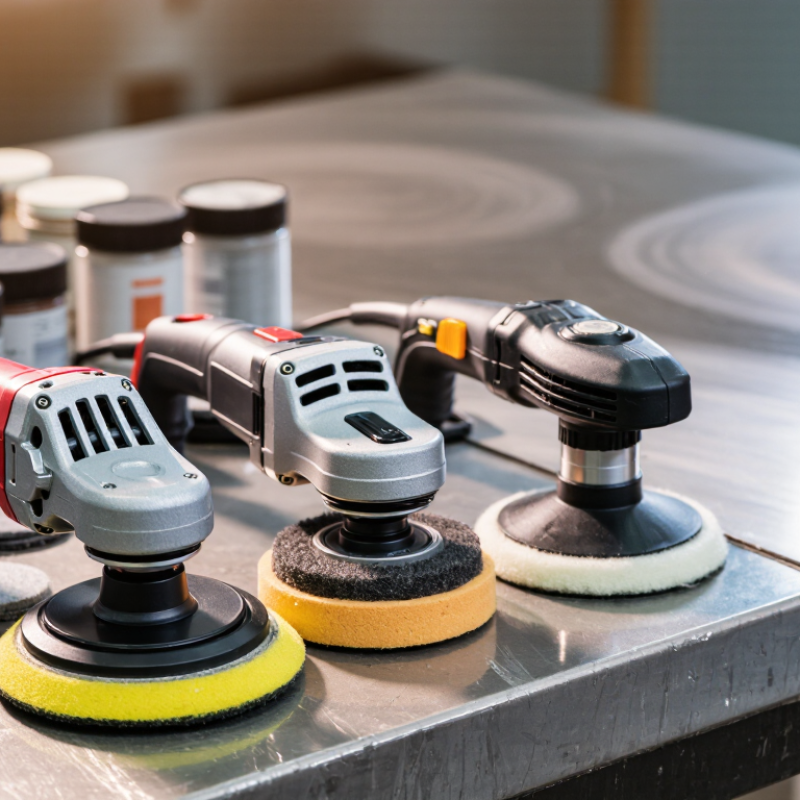
Machines save time on broad, flat surfaces. Rotary polishers provide strong cutting power, but they can create heat marks quickly. Dual-action machines offer safer movement for beginners and delicate finishes. Keep the pad flat and use light, even pressure. I have seen operators press harder when results slow down. That usually increases heat instead of improving clarity. Check the machine’s speed range, pad compatibility, and dust control before purchase.

Manual tools remain valuable around corners, seams, and fragile parts. Felt blocks, hand pads, and small abrasive papers provide better tactile feedback. They are slower, but they reduce the risk of removing too much material. Test every abrasive on an unseen area or spare piece first. Surface hardness, coating thickness, and operator technique can change the result. My own tool choices have sometimes been too ambitious. A slower process often produces the more consistent finish.

Matching Tool Features to Safety, Efficiency, and Budget

How to Choose the Best Polishing Tools in 2026?

Matching Tool Features to Safety, Efficiency, and Budget

Choosing a polishing tool should begin with the workpiece, finish, and operating environment. The best tool is not always the fastest one. Check its speed range, grip, weight, guard design, and vibration level. Match the tool’s maximum speed with the pad or abrasive specification. Use the lowest effective speed during testing. Wear suitable eye, hearing, and respiratory protection. Keep cables and loose clothing away from rotating parts. Safety comes first.

Efficiency depends on control, not only power. A variable-speed tool can reduce surface damage and improve consistency. Dust extraction can protect visibility and reduce cleanup time. Test the tool on a small, hidden area before full production. Record the speed, pad type, working time, and surface result. This simple record supports repeatable decisions. Workshop trials often reveal that operator fatigue slows work more than a weaker motor. Comfort matters.

Budget calculations should include pads, maintenance, training, energy, and replacement parts. A cheaper tool may cost more when consumables wear quickly. Check adjustment access and cleaning requirements before purchase. Ask whether essential parts are easy to source through reliable channels. My selection sheets are not perfect; noise and fatigue can change the result. Leave room for those practical surprises. Perfect calculations rarely survive real workshop conditions.

Building a Practical Polishing Tool Selection Process

How to Choose the Best Polishing Tools in 2026?

Building a Practical Polishing Tool Selection Process

A reliable selection process starts with the workpiece, not the tool catalog. Record the material, surface size, target finish, and production volume. Stainless steel may need controlled heat, while aluminum can clog an abrasive quickly. Small details matter.

I usually test three tool types on a hidden section first. I note cutting speed, vibration, dust, temperature, and operator fatigue. A tool that removes marks quickly may create uneven reflections. That failure is useful. It reveals what the specification sheet cannot show. Measure the surface with consistent lighting, not casual inspection.

Check technical data from manufacturers, independent testing bodies, and workplace safety guidance. Confirm speed ranges, compatible abrasives, guard requirements, and replacement-part availability. Do not trust one online review. Evidence should agree across several sources. A simple trial log can include tool setting, abrasive grade, pass count, and finish result. Keep photographs beside each entry.

Budget for more than the purchase price. Consumable life, training time, maintenance, and rejected parts often change the real cost. Ask an experienced operator to repeat the test without coaching. Their feedback may expose awkward controls or poor balance. My own first shortlist is often wrong. A second trial prevents confident mistakes. Even then, the best choice may depend on the person holding it.

How to Choose the Best Polishing Tools in 2026? - Building a Practical Polishing Tool Selection Process
Selection Stage Tool Category Primary Function Suitable Materials Typical Abrasive Range Surface Result Material Removal Control and Heat Risk Best Use Case Key Selection Check
1. Remove heavy damage Bonded abrasive wheel Fast stock removal, edge correction, weld blending, and rust removal Carbon steel, stainless steel, cast iron, and other ferrous metals Coarse grades, commonly about 16–36 grit Rough, visibly abraded surface that normally requires follow-up finishing Very high Moderate control; high heat and gouging risk if excessive pressure is applied Deep scratches, weld buildup, sharp edges, and severe corrosion Confirm wheel type, maximum operating speed, machine compatibility, and guard requirements
1. Remove heavy damage Abrasive flap disc Blends welds, removes surface defects, and creates a more uniform scratch pattern Steel, stainless steel, aluminum, and non-ferrous metals when the abrasive is compatible Coarse to medium grades, commonly about 24–80 grit More consistent and blended than a bonded wheel; visible directional scratches remain High Good control; heat risk increases with high pressure, worn flaps, or slow movement Weld blending and preparation before finer abrasive steps Choose the correct abrasive material and backing shape for the required contour
2. Refine the surface Abrasive belt Levels surfaces and removes scratches over broad, flat, or gently curved areas Metals, wood, plastics, and composites, depending on abrasive backing and grade Coarse to fine grades, commonly about 40–400 grit Directional, uniform finish with predictable scratch depth Medium to high High control on flat surfaces; heat and belt loading must be monitored Long panels, flat parts, consistent grain finishes, and pre-polishing Match belt width, backing flexibility, abrasive grade, and machine speed to the workpiece
2. Refine the surface Non-woven abrasive wheel or disc Blends, deburrs, cleans, and creates a uniform satin or brushed finish Stainless steel, aluminum, carbon steel, and many coated or painted surfaces Fine to very fine abrasive constructions; grit labeling varies by supplier Low-glare satin finish with less aggressive scratch definition Low to medium Good control and relatively low gouging risk; pressure still affects heat and finish uniformity Deburring, light oxidation removal, blending, and cosmetic surface preparation Use a test area because color, density, and finish depend strongly on tool construction
3. Prepare for polishing Fine abrasive disc or finishing pad Reduces previous scratch marks and prepares the surface for a compound-based polish Metals, plastics, painted surfaces, and clear-coated materials when correctly specified Fine grades, commonly about 120–800 grit Fine, even scratch pattern suitable for progressive finishing Low to medium Good control; lower heat risk than aggressive tools when used with light pressure Transitioning from grinding or sanding to a reflective finish Do not skip grades when deep scratches remain; the next grade may not remove them efficiently
4. Create a reflective finish Abrasive compound with a sewn or stitched polishing wheel Removes fine haze and produces a bright or reflective finish after surface preparation Aluminum, stainless steel, copper, brass, and other polishable metals Compound color and grade systems vary; select by cutting or finishing function Bright to reflective finish, depending on compound, wheel firmness, and preparation quality Low Moderate control; heat, smearing, and contamination are common risks Final polishing of metal parts after scratches have been removed Use separate wheels for different compounds and keep the workpiece below its heat limit
4. Maximize gloss Loose or unstitched polishing wheel with fine compound Refines an already prepared surface and increases clarity and gloss Aluminum, stainless steel, copper, brass, precious metals, and suitable plastics Very fine compound systems intended for final finishing High gloss and improved optical clarity when the substrate is uniformly prepared Very low High finish sensitivity; excessive pressure can cause heat marks and uneven gloss Final luster, display surfaces, trim, and cosmetic components Use only after coarse scratches and surface waviness have been removed
4. Precision finishing Diamond paste or diamond compound with a precision pad Produces very fine finishes on hard materials and precision surfaces Hardened steel, carbide, glass, ceramics, and selected hard polymers Micron-rated grades, often from approximately 0.25 to 15 micrometers Very fine, low-roughness finish when used in a controlled progression Very low High process control required; contamination can create random scratches Molds, dies, precision components, and surfaces requiring controlled roughness Define the target roughness, clean between grades, and use a compatible lubricant if specified
5. Validate the process Inspection and measurement accessories Verify gloss, scratch removal, surface roughness, flatness, and temperature control Applicable to metal, plastic, glass, ceramic, and coated workpieces Not applicable; measurement depends on the selected quality criterion Confirms whether the finish meets the required visual or measurable standard Not applicable Improves process consistency and reduces subjective acceptance decisions Production approval, quality control, process comparison, and troubleshooting Define acceptance criteria before polishing, including lighting, roughness, gloss, and defect limits
Practical selection rule: Start with the least aggressive tool that can remove the existing defect, then progress through finer abrasives without skipping the scratch-removal stages. Always verify the tool's maximum speed, machine compatibility, workpiece material, required finish, and applicable safety controls before use.
All search results